Inspiration for a Winter Living Room: Hygge


Have you heard of Hygge yet? 

Whether the answer is yes or no, let's settle in for a nice cozy little chat about my new favorite thing.  Grab a hot drink and a thick, fluffy blanket and curl up in a chair.  Light a candle or 12 if that's more your style.  I'm so happy today to talk about Oxford Dictionary's 2016 word of the year finalist 'hygge'. 

If you're one of my winter people in the Northern Hemisphere, savoring every extra minute of daylight we get this time of year, but slowly depleting your vitamin D (and, with it, easy joy & energy) as you wait for spring, you're going to feel just plain good after you even imagine your life with touches of hygge in it.  Just please trust me on this.


Simply put, hygge is a mindset, a way of enjoying good things with good people. 

It's about creating a warm atmosphere.

British journalist Helen Russell wrote “The Year of Living Danishly”  and defines hygge as “taking pleasure in the presence of gentle, soothing things.”  Warm, fresh from the oven buns, hot homemade coffee and thick warm blankets.  

Louisa Thomsen Brits, the author of “The Book of Hygge: The Danish Art of Contentment, Comfort, and Connection,” talks about hygge as “a practical way of creating sanctuary in the middle of very real life” and “a cure for SAD”— seasonal affective disorder. 

Wellness guide and cookbook, "How to Hygge: The Nordic Secrets to a Happy Life" written by Signe Johansen,  says hygge also has something to do with simple, hearty food and drinks.   Well if that doesn't sound like heaven in the middle of a very long, cold, dark season, I don't know what would.


Here's what some Danish folks have to say about this beautiful tradition that the rest of the world is slowly falling in love with.


Danish people are the happiest people in the world.  

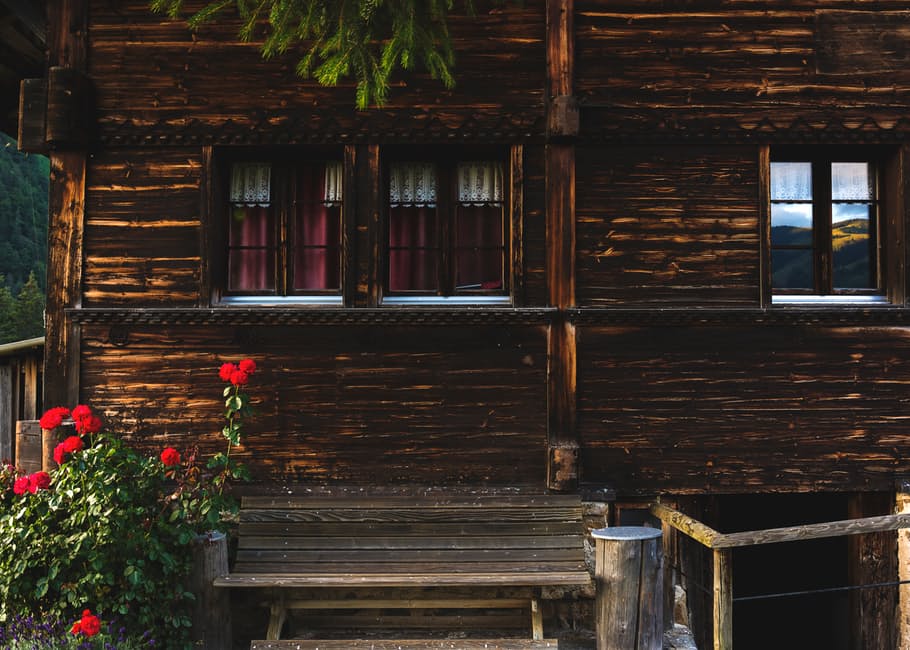
They are on to something beautiful that gets them through what can easily sink anyone's happy-ship:  grey, endless winters.  I think it's a concept that could bring nothing but good, happy, comfortable feelings to your home and your life, so I've put together a list of 15 of basic elements you can add to your living room to get a little hygge feeling going. 


My Top 15 Hygge Basics for Your Living Room


1. Soft, natural throws and blankets.


2. Plush, oversized pillows in fabrics that are soft to the touch.


3. Warm, soft lighting.  Dimmers, warm-toned bulbs.  Twinkle fairy lights.


4. Candles.  And a few more candles.


5. A roaring fire.


6. A tray for an eclectic mug and small plate collection for treats and snacks.


7. A few more blankets. Why not?


8. Fabrics in natural fibres and colors.


9. Good quality, sturdy, natural elements - baskets, boxes, furniture.


10. Bring a bit of nature inside - a few pine boughs, branches with red berries, a small bowl of stones.


11. A stack of great books to immerse yourself in.


12. A small collection of puzzles, board games or cards.


13. Music.  Find something earthy and calming that makes you feel like you're in a chalet in the mountains.


14. Casual family photos of happy times.


15. A thick, plush rug.

sortes-et-types-de-laine.jpg

I can't wait to see what kind of good vibes you can cultivate for yourself at home this winter!   The mission of hygge is simple:  relaxation, gratitude and indulgence in a beautiful intimate atmosphere.


Ready to love where you live?

Join 25 000 others for instant access to my library of free, practical, and down-to-earth interior design resources!

Looking to Pin for later?

Here you go!

true design house - hygge - 36 - pinterest - 4.png

7 Simple Steps for a Fresh Start at Home


There are times of the year that are like waking up from a really beautiful dream, times that are the quiet 'after' of something big and exciting and all-consuming in our lives.  Or maybe it's more like the ugly kind of waking up, startled from one of those dreams where you are being chased all night - you're relieved, sweaty and full of anxiety.  I don't judge.  On days like this you're turning a new page and waking up in the 'after'.

After summer holidays.

The quiet lull after Halloween.

Post Christmas abyss.

There is some kind of overwhelming hangover effect as you look around in the days after and realize that now that it's all over, all of this less-than-glittery stuff now needs to be cleaned up, organized, hauled to wherever it lives for most of the year.  It's all the physical and emotional weight of an event, without the excitement and happiness to float you along.  It can really drag a person down.  I hear you.

You crave a fresh start.

What you need to do is act swiftly to clean it up, pack it away and move on.  You need to give yourself a clean slate because a fresh start is where the magic happens.  It's where you can take a deep breath, feel light and unburdened and start to thoughtfully place some happiness in your daily life.


Here's a few simple ways to make that happen today.  

By tonight you could be curled up with a hot cup of tea, looking around your beautiful, clear space, just basking in that great fresh-start feeling!


DeathtoStock_QuietFrontier-04.jpg

1.

Clear space for storage.  Wherever that might be, make sure it's ready to go.


2.

Gather the boxes, bags or totes where you're going to be working.  If you are putting away seasonal things, chances are you already have a system in place.  If not, that's ok, just gather what you think will work.  Don't overthink this, you don't need the perfect totes or specialty boxes.  Grab what you have or can get easily.  Momentum is key here, don't lose it.


3.

Working swiftly, wrap things up and get them put away.  As you fill each box, take it to your storage area and move along.


4.

Clear away anything that doesn't belong in the space.  This is a great time to fill a box or bag with things to donate.  Be liberal with getting rid of things that no longer serve you or that you don't love anymore.  Recycle or throw away anything that is garbage.


5.

Once everything is cleared, do a quick clean.  This isn't the time to scrub baseboards and organize drawers.  Surface clean, dust and sweep or vacuum.  Fold and put away.  Give everything a quick wipe down.


By now you should be feeling pretty good.  A clean slate has that effect!


6.

Next, it's time to tackle those maintenance items that tend to get brushed aside during daily life.  Common things I see are burnt out light bulbs, squeaky door hinges, and throw pillow covers that need a wash.  Anything that can be handled in a few minutes with what you have on hand.  If you can't get to it right away, make a little to-do list and deal with things as soon as you can over the next few days.  Again, this should be small stuff - we are not refinishing floors here.  Just handle the little jobs that you've been neglecting - we all have them!


7.

The final thing to do is small but important:  add a couple of meaningful items.  You just need a thing or two for this to work - don't overwhelm your space with clutter.  The goal here is to give yourself some breathing room for a little while.  Enjoy the openness and clear space before moving onward in your decorating.  Find an item or two that give you a happy feeling - a stone from a river walk that your kids found, a beloved snapshot from a vacation,  a teacup from your grandma.  Place them wherever feels good, where you can see them daily.  This isn't permanent so don't overthink it.


pexels-photo-287222.jpeg

I challenge you to leave your space in this open, clear state for a week or so. Enjoy the uncluttered, unburdened feeling.  This is what a fresh start is all about:  giving yourself time and space to reset. 

Take some time during this week to immerse yourself in inspiration.  Check out photos online, magazines, books and blogs- you'll soon see a pattern in the things you are drawn to.  It won't take long before you start to think of what would be good additions to the space, how it might function better, how it could be organized differently.  You'll probably start to think about things to do to your room, ways you could make it exactly how you want it to look and feel.  If you go forward thoughtfully, only adding things to your space that enhance it, you will have soaked up the full benefit of your fresh start.

Enjoy that fresh start feeling - you earned it!


Ready to love where you live?

Join 25 000 others for instant access to my library of free, practical, and down-to-earth interior design resources!

 Looking to Pin for later?

Here you go!


true design house - fresh start - 35 - pinterest - 4.png

Quick and Simple Curb Appeal Basics– A Crash Course from an Interior Designer


 The goal with curb appeal is to make your property appealing and memorable.  This applies whether you are getting ready to sell your home or you just want to have a front facade you are proud to have your family and friends pull up to.   As you work, keep those 2 words in mind:  appealing & memorable.  Let’s get started!

There are 3 main steps I think about when working with clients on their exterior facade and I’m going to walk you through them and explain a bit of theory as we go.  At the end, I have a checklist of tips for you to print and go through as you are getting things done.  For the most part, this is an afternoon project.  If you need to do some repair work or go shopping, it might add on some time, but far and away, most of my clients can get this done quickly with a little bit of physical labour and by using what they have around the house already.


1.       Prep:

This is the time to clean & clear as much as you can – give yourself a blank slate to work with. 

This step makes the most difference when you are preparing to sell your home.  You might be able to see past a lot of these things, but potential buyers normally can’t.  Where you see ‘I need to get out and rake those leaves this weekend’ your buyer sees ‘wow, there is way too much yardwork to keep up with here, no thanks’.  It’s so subconscious, and I’m sure they are very nice people but those little things add up very quickly to buyers, often without them even realizing it.  The more you can do to keep that subconscious to-do list short, the better! 

If you are just working on curb appeal for your own happiness, it is also important to start with this step.  Much like decluttering inside your home, it will be easier for you to enjoy your yard and be proud of your home without a bunch of little annoyances in sight.


pexels-photo-29410.jpg

2.       Create the feeling of an appealing lifestyle:

So much of the power of curb appeal lies in helping people see the lovely parts of the life that you have in your home.  This is the good feeling people have when walking up to your front door.  It’s a feeling that makes your visitors want to sit with you on the porch and put their feet up.  It makes potential buyers want to have coffee in the morning looking out on that yard.  You need to create a vignette, make a case or create a good vibe, whatever you want to call it. 

The appeal almost universally lies in conveying a relaxed, orderly, safe, calm lifestyle.  This is achieved by creating an outdoor seating area (even a small stool suggests this), having flowers or foliage around the front door, having a great door mat and clear house numbers and even things like thoughtful lighting.  You want people to walk up to your front door and exhale ‘ahhhh, this is so nice.’

If you are selling your home, you can also add some staging to the front area.  What is the lifestyle appeal of your home or area and is there anything that gives a subtle nod to it?  If you live near a lake, a fishing rod leaning in the corner is great.  If a park is within walking distance for kids, a nice basket with some outdoor balls in it or a baseball bat & mitts does the trick.   If you have a nice porch that is great for having morning coffee on, leave a book and clean coffee mug on the side table of your porch seating area.  These are all small touches but they can be very powerful subconscious messages to potential buyers about the appealing lifestyle you have in that home.


3.       Make your home memorable:

Here is where you add the icing on the cake.  This last step is a powerhouse if you are preparing to sell your home, but it’s also that next level up if you just want to love pulling up to your own home that little extra bit.

Why is this important?  Buyers aren’t just looking at one house, they are scanning online listings, looking at flyers, and generally absorbing a barrage of details about a lot of homes.  They are doing this for weeks or months sometimes.  After awhile those houses can start to melt into one another.  It’s a funny thing, but the smallest detail about your home that sticks in someone’s mind means that your home is at the top of the list in their brain, along with all the relevant details about your home.  Familiarity is comforting and when someone is faced with a huge life change like moving, the more they think about your house, the more comfortable they feel with it and the more comfortable they feel with it, the more they are going to gravitate toward living in it.  This is great news when you want to sell it, right?

If you’re not selling, this same factor is what helps your friends and family feel comfortable in your home.  It also means that because you are putting that extra bit of your own personality into your space, you are going to be extra happy there as well.  There is no downside to this!

What makes a home memorable?  Mainly, it comes down to this:  one or two things that are bigger, bolder and more colorful than their surroundings.  You need a statement.  Something unique.  Something in a bright color or interesting material.   Something that makes people say ‘oh, the house with the _____?!  I know that house!’

Does it need to be a purple cow statue on the front lawn or a toilet bowl planter full of foliage?  Um, no.   Those might be conversation starters, but I’m not sure that’s the vibe you want your home to be giving off (or maybe it is, I don’t judge.)  There are lots of great ideas that will also enhance the style of your home.  Consider a few nice planters overflowing with bright flowers near the door, a unique color painted on the front door, house numbers painted a bold color, a door mat with some style, a really great light fixture at the door, or maybe just one bold colored accessory on the porch.


A checklist for my people getting ready to list their house:

I know how overwhelmed and busy you can feel if you are getting ready to sell your home, so I’ve created a checklist for you to print off and work through.  It can really help to calm that mental chaos if you can just work through something step by step.  It's ready and waiting for instant download in my free Design Resource Library -  check out that link below to have it instantly emailed to you.


My advice for getting this done? 

1. Print the checklist from my resource library. 

2. Do a 15 minute walk around and see if you need to buy anything (cleaning supplies, paint, whatever) and make a list. 

3. Gather what you need and get it in one spot (hoses, ladder, etc). 

4. Set aside 2 -3 hours to improve your curb appeal.  Do what you can and move along.  

5. If you have more time later, keep working on things you didn’t get to, but any improvement is good and nothing is ever going to be perfect!  You can do this!

Ps - Not all of the tips will apply to every home, so just cross off any that don’t apply to you – doesn’t that feel great? 


the home staging lab pg 1j.jpg


Looking to Pin for later?

Here you go!


Ready to love where you live?

Join over 16 000 others for instant access to my library of free, practical, and down-to-earth interior design resources!

Make Your Oak Kitchen a Pinterest Stunner (in one weekend, without a major reno!)


When you are not ready, willing or able to do a complete renovation of your oak kitchen, the next best thing to do is transform it with pure style.  Yes, it can look absolutely amazing!  

If you can paint the walls, add a rug or two and accessorize until your heart explodes, your kitchen can go from 'Sad & Outdated' to 'Pinterest Stunner' in a weekend!


Level one:

Clear away all the clutter, banish accessories that are too beige or orange, and give yourself a clean slate.  

Choose one or two accent colors and choose accessories in several shades of that color.  In the example below, I went with a rich turquoise.  Blues and greens are great shades to work with honey oak as they both neutralize the orange tones in the wood really well.  At the most basic level, even just adding lots of eye-catching accessories will take the focus off of the oak.   

Rugs are a great investment in an oak kitchen, especially if the flooring is dated or isn’t the style you are aiming for.  


Level two: 

If you can paint the walls, it creates a gorgeous backdrop that downplays the oak and pulls everything together.  Please, please do this if you can!  Have time and inclination to paint baseboards and trim, maybe even the table or other furniture?  A creamy, neutral white will take things up a notch. 

Major bang for your buck: changing out the door and drawer hardware for a dark oil-rubbed bronze pull in a smooth look that is big enough to make a statement.  This is so easy to do and makes an incredible difference in the style of your kitchen.  

Also within the ‘DIY category’ of changes:  updating the lighting fixtures to something sleek and stylish, something without too much detail, is a huge style-maker as well.


Level three:

Ready for some minor renos that you can totally tackle yourself or have done in a few days by a pro?  

Replacing the counter top with a deep charcoal or graphite colored laminate and adding a gorgeous hexagon marble backsplash will transform your kitchen completely.  These items are a bit more of an investment, but not out of range if you are going to be making do with your oak kitchen for a few more years.  

The 'wow factor' of these larger ticket items make them well worth it.  They are absolute game changers for the feel of your kitchen as they take up so much visual real estate.


What not to do:

In general, I wouldn't waste your resources or precious renovation energy on replacing flooring or adding stone countertops to an oak kitchen.  

Why not?  Well, chances are when the time comes to replace or refinish the entire kitchen cabinetry, you are going to want to change those things at that time to either coordinate with the new cabinets or because styles have changed and they will need updating also.

You also don't like want to get 'out of your league' when it comes to return on investment with the kitchen cabinets as-is.  If you sell your home before renovating any further, sinking big bucks into major items in an outdated kitchen is not always a wise investment.


Getting started:

I had a lot of fun putting together a look that you can actually shop!


This post may contain affiliate links. For more information please click on the 'policies' tab at the bottom of this page.


Looking for the summer 2021 update?


Need a bit more in-depth help updating your oak kitchen?


Looking to Pin for later?

Here you go!

true design house - oak - 16 - pinterest - 4b.jpg


Stunning Paint Colors That Will Make Your Brick Exterior Beautiful


Need some design inspiration for your brick exterior? Looking for the best paint colors to go with brick?

Sounds like you’re ready to breathe some new life into the outside of your brick home - good news, you’re in the right place for some very specific advice & paint suggestions.

There are a few basic design theories and practices that take a brick exterior from tired to knockout and I’m going to walk you through them and, don’t worry, I also have a downloadable cheat sheet with a curated collection of 14 Benjamin Moore paint colors that will make your brick exterior beautiful. 

Let’s get started!


1. The 3 Color Rule

A general design rule of thumb is that exteriors look best with a combination of 3 colors. 

This gives a good balance between the main overall background color and some details that can be a bit bolder without overwhelming the house.  For most people, the goal is for it to be cohesive and gorgeous with just a bit of ‘oh, that looks so good!’ wow factor.


Main Color

The main color is what would normally be the central siding or stucco color.  This is sometimes called a field color.  This would be a nice, rich tone that you can live with for a long time or that is neutral enough for resale down the road. 

If this is the brick portion of your house, then this is taken care of!

This color tends to be the biggest financial investment as well, so it makes good sense to go with something that can serve as a nice background for years to come.   

You can dramatically change the look of a good neutral main color by changing up the ‘quick and easy’ accent color in places like the front door or shutters, so choose wisely here.  This is the time to consider the architecture of your home and of your neighborhood and to take a good look at heritage colors.  These tend to be mature colors that have stood the test of time and are not likely to go out of fashion anytime soon.    

You also want to think about whether you want to have your home color be cohesive with the rest of the houses in your neighborhood (mostly, the answer is yes!)  You don’t want to be ‘that family’, right?   Unless you do want to be, then go for it – whatever makes you happy!

Secondary Color (Or Secondary Grouping)

The secondary color is often seen in stonework on the front facade, like field stone, slate or possibly this is the brick we are talking about today.   

The secondary color might also be the trim of the house – fascia, gutters, window trim, railings, etc.  If there is not a lot of stone, I tend to let that sit as a ‘near-neutral’, a ‘secondary-secondary’ color because you kind of do need and want a separate trim color in a lot of cases. 

Some houses will use a paint color for the trim that matches the stone and that can work as a ‘secondary team’ also. 

This grouping of secondary colors should not take up a huge amount of the area of the house facade because you don’t want your stone and trim to compete with the main color of the house but you want to have more of this neutral color than your accent color. 

This color is great to break up the facade of the house visually, highlight architecture (like windows, gables, flower planters and porches), and give some depth or balance to what can sometimes otherwise be a large, flat rectangle.  You wants lots of contrast between the secondary and main colors in most cases.

The Accent Color

A bright, bold or eye-catching color might be perfect for the front door but would be a bit crazy on the entire house, which is where that third color, the accent color, comes in. 

This is the place to go a bit bolder and choose something that will make a statement if you like.  It can also be the place to, finally, show some personality in the exterior colors or to just use color to evoke some feeling. 

The accent color doesn’t need to be a bright red door that announces your style to everyone who passes by, it can also be a deep charcoal paint on the shutters or a soft butter yellow on the porch floor.  This is the place to create some style.


 2. Perfect Ratio

There is a design theory of the perfect ratio for these 3 colors:  60:30:10.  This provides the main color, a secondary color and an accent color.  Use this ratio, it is your friend!

To use this information with a brick exterior, you need to use the brick as one of your three colors.  Depending on the amount of brick, this will likely be the main or secondary color.


3. Your brick tone

You also need to take your own brick’s tone into consideration before starting to look at other colors.  There are likely variations in the colors on the entire area, as well as within each brick, but the overall brick can be red, coral, orange, pale peach, grey, or even purple toned. 

Taking a digital picture and looking at it from far away can help figure this out if it’s not obvious right away.  It can also help to have a photo when looking at colors. 

Make sure to hold your samples up to your brick and take pictures of the whole grouping together to get a different perspective of how the colors will look together.


 4. Architectural details

Consider the color of other architectural features.  If they are permanent or you just don’t want to change them right now, they need to work well with the colors you are choosing for the facade.  Look objectively at these areas:  the roof, window trim & mullions, railings, stucco, vinyl siding, flower bed or planter building material. 

Some of these things you might want to paint your main or secondary color, but some are just going to soldier on as-is, so you are going to have to work with them.  You should always be able to work around things that can’t be changed and it’s sometimes surprising just how different things can look with the right paint colors around them... so, yes, there’s even aesthetic hope for that ugly roof you’re saving up to replace!


 5. Landscape flow

Landscaping plays an important role as well.  The colors of dominant shrubs, flowers, planters, and trees near the front of the house should also be looked at objectively. 

If you have, especially, some mass plantings of bold colored flowers along the house front, you are going to want to ensure that either your paint enhances or harmonizes with these or that you are willing to transplant them elsewhere and replant something that will be gorgeous with the colors you have chosen.


I’ve created a little Brick & Paint package for you!

It includes:

  • a set of 14 Benjamin Moore paint colors that pair well with brick

  • a paint finder tool to screenshot and take to the paint store with you

  • a graphic summary of the tips outlined in this article. 

 
True Design House - brick paint mini houses 2.png
 

Wait! Do you need more specific help?

Slide2 - sm.png

Did you know you can hire me to help you choose your exterior paint colors and paint them right onto your house?

2.png
8.png
5.png


Looking to Pin for later?

Here you go!

true design house - brick - 30 - pinterest - 4.png